 Random image Random image |
 |

CREEP
nitrocharged
|
 |
|
 |
 |
SLINKI
| SLINKI |
| Description: |
A few years ago I built Eric Marsden's 'Vannus', which was a free plan in one of the mags. Typically of me though, I couldn't just build his design as it was but had to give it a completely new fuselage design and alter a few other details here and there into the bargain. Eric designed it for the KP 02 in pusher mode which flew splendidly and has given many pleasurable flights (thanks Eric), although it does have a tendency to wander all over the sky. It will happily turn to the left or right at the merest whim and has given me a few heart stopping moments when it has sailed off upwind over buildings and the like, then turned and come back to safety as if it was just teasing me.
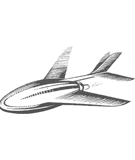
I was so pleased with it in fact that I scaled it down to 19 inch span as a profile model for the Rapier and have flown mine to date with a variety of Rapiers and even a tiny pusher Gasparin with which it has flown for over a minute indoors. This is the model drawn. I have enlarged the fins a little, which seems to have cured the wanderlust. With the 80mN L1, it is a great little flier and will tolerate a fairly tight turning circle as long as it is not too nose heavy.
L2 Rapiers produce too much power for Slinki as it gets wing flutter when it flies fast, so I added lots of carbon fibre strands to mine to try and prevent this. The best cure, though, is to fly it on the L1, which is quite enough despite seeming too large a model. Apart from shedding a tip once or twice it has been remarkably free from damage so it is tough enough for the usual rough and tumble even though all the joints are just butted together with cyano.
Resize the plan (either in a graphics program or on a photocopier) so that in the final printout it measures 8 inches wide by 10.95 inches long – it just fits nicely onto A4. There is no need to use hard balsa – medium is just fine. Sand all the balsa and, provided you don't try to fly it in the damp, don't bother with any other finishing. Add a small chamfer to both ends of each wing with a sanding block to get the dihedral angles of the wing and tips. The Rapier mount is the now standard paper tube and light wire retaining clip and in this position you won't get any burns launching it. Do add the canopy colouring (permanent black marker pen) which makes it a cute little model.
Check that all the surfaces are flat with the mark one eyeball and test glide with an empty motor. Start by getting it to fly straight or almost straight. If it doesn't tweak the lower rear corner of the tip on the outside of the turn outwards a little until it does. Add ballast to the nose to get rid of a stall or to the tail if it dives – mine has a couple of grams in the nose.
Neither photo does it justice. Note that the one on this page shows the Gasparin CO2 motor in place. You have no excuse not to build it as it only takes a sheet of sixteenth and a few minutes (who am I kidding?). No – go on, pick up that scalpel. Enjoy your Slinki – just don't try to get it to do that funny trick down stairs, you'll break it. |
| Keywords: |
slinki rapier howard metcalfe |
| Date: |
05.01.2021 09:11 |
| Hits: |
3662 |
| Downloads: |
28 |
| Rating: |
1.00 (1 Vote(s)) |
| File size: |
16.8 KB |
| Added by: |
nitrocharged |
|
|
 |
